Figure 1
What is the "Upload Files" Option for?
Both Customer and City Staff plan checkers are provided with the "Upload Files" option.
The purpose of this option is to provide the
customer or City staff with a way of transferring files of plans in electronic
format from their local or network drives to the server that holds the permit
application and attachments.
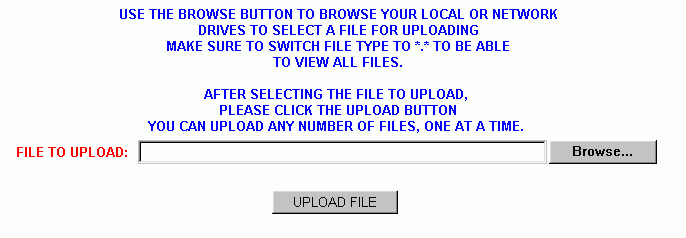
The "Upload files" Screen looks like the Figure1 below:
Figure 1
As you can see the screen has two command buttons, the UPLOAD FILE AND the Browse Buttons.
The Browse button has to be used first. Basically this button allows you to browse your local or network drives to select a file to upload. Once you click the Browse button, you will be presented with Figure 2 Below.
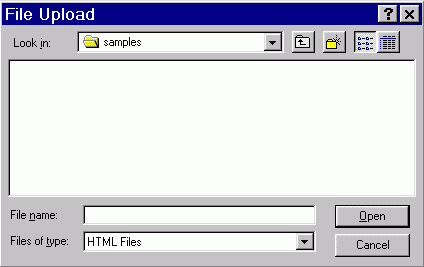
Figure 2
Change the Files of Type option to All Files (*.*) as in Figure 3 so that you can see all files types. (The default is always HTML Files).
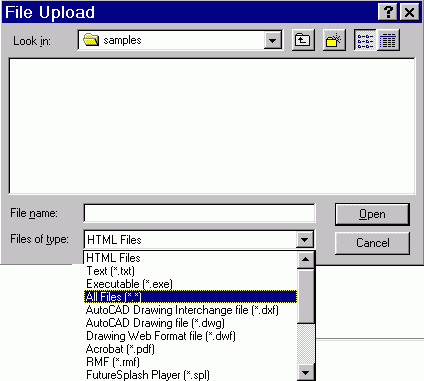
Figure 3
Once a file is selected, its name will appear in the text box shown in Figure 4.
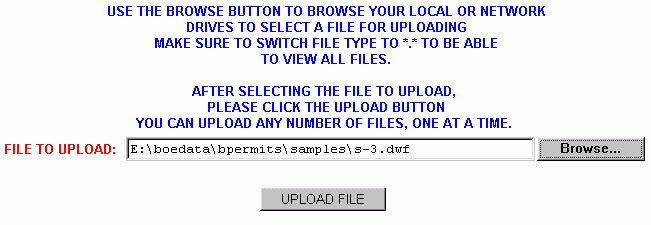
Figure 4
Now you can click the UPLOAD FILE button and the selected file will be uploaded to the City Server and will be available to our plan checker right away.
Note:
Currently we can accept two file formats:
dwf, AutoCAD Drawing Web Format and tif image for
scanned files.
The server will not accept uploads of any other type at this point of time.
Uploaded Files and Markups can be viewed from the Customer side and on the City side.
To view dwf files you need to install Autodesk Whip plug-in or Volo Express Viewer. Both viewer are available at no charge from Autodesk.